Engine strip and re-build

This forum is for informative threads, if you feel a topic should be in here then let us know and we will move it.

Moderator: Moderators

Post Reply
User avatar
Mori Man
Blingmeister
Blingmeister
Posts: 1976
Joined: Thu May 10, 2007 3:30 pm
My Bike: ZXR400J2
Location: JAPAN

Engine strip and re-build

Post by Mori Man »

Maybe a few will be tackling this over the winter or just a shim check - either way hope this helps.

The most daunting part is actually removing the engine from the bike, stripping it down is fairly straight forward and quick.

I cheated and had this one delivered yesterday, so while still in my hallway I stripped it to bit's for storing just now.

1st off, thoroughly clean your engine with de-greaser (Jizer is good but avoid gunk unless motorcycle specific stuff). Dry the engine of with compressed air, a PC duster can will do.

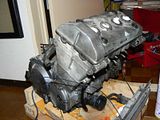
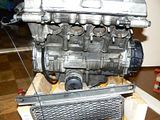
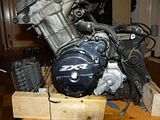
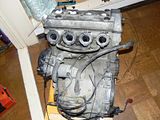
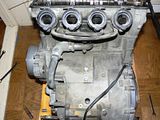
here is my donor motor - not the prettiest: (Click on thumb nail for larger image)
Image
Image
Image
Image

I started with removing as much of the external components as possible, starter motor off
Image

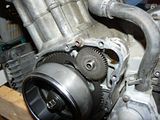
If you remove the generator cover (needs a tug as there's a huge magnet in there) you'll get access to the drive cog which has a dowl pin locating it into the casing - this is easily removed and the cog will come away. With the starter motor fixing bolts removed it will also easily come away from the engine casing (Not essential but helps).
Image

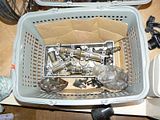
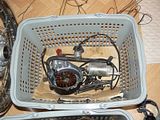
I had two baskets at my side, one for dry stuff and the other for wet
Image
Image

With the rocker cover removed (four bolts) you'll see the cam caps
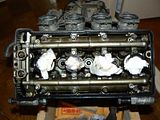
Image

next you want to set the engine up to it's timing marks, use a 19mm socket on the pulsar plate bolt to rotate the engine clockwise, if you pass the timing mark to crankcase position do not be tempted to drag the timing back anti clockwise! Keep rotating clockwise for another near 360' as you approah the point you will feel a resistance as you are reaching Top Dead Centre.
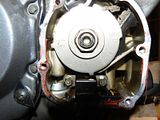
Image

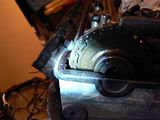
The "T" marks on the pulsar plate should look like this and line up on either side with the two engine casing mating surfaces
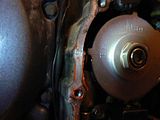
Image

The notches on the cam shaft sprockets will line up on the head to rocker cover mating surface (Gasket removed)
(Please note that on this engine the inlet has been set one tooth retarded which produces more mid range and is a common trick in Kwak motors, but please set yours correctly)
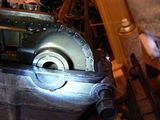
Image
Image

This is the same technique for doing your valve / shim clearances, at this setting you can measure the following valves (Leave at this setting for stripping the engine)

In # 2&4 Ex # 3&4

turn the timing marks 180' and you can then do

In # 1&3 Ex # 1&2

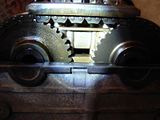
The cam marks will look like this
Image

Removing the cam's:

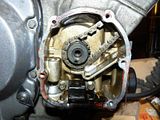
Remove cam chain tensioner - underside of pulsar housing, remove cam chain damper inside pulsar chamber and remove the cam chain guides out of the tunnel from the top. I also removed the pulsar as there is no need to rotate the engine
Image

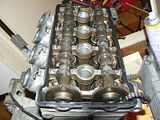
The cam caps are numbered and must be re-fitted in the same location. Undo the mounting bolts in a zig-zag from right to left then back down doing the remaining bolts. Only crack the torque on them initially then small amount after that, you want this to be a slow process as you are releasing the pressure from the compressed valves - try and make the cam lift evenly until all bolts run freely. Same procedure for other cam.
Image

Handle the camshaft with care and wrap them up in a clean oil soaked rag or spray with oil and wrap with cling film, I then placed mine in a shoe box on a bed of scrunged up newspaper.
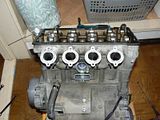

Image

Removing the cylinder head:

Now with the cam's out of the way you can get the head off, you have 10 bolts to remove and again these need to be done in sequence. Like the cam cap's you are only initially cracking the torque off them and not fully un-doing them.
From the cam chain tunnel side start with the front exhaust (10) then the inlet (9) then across too the opposite side of the engine and do Ex (8) and In (7) back over and Ex(6) and In (5) hop over too Ex(4) and In (3) leaving you the two centre bolts Ex(2) and In (1).
Keep going round them moving them a small bit at a time until the start to run free then fully remove one at a time.
You have one final allen bolt to remove inside the cam chain tunnel before the head can be removed
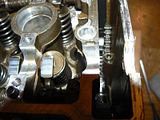
Image

Then the head will easily be removed - it may need a slight knock with a rubber mallet.
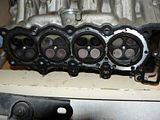
Image

You can then lift the barrels very easily off too - try pulling it up with one hand and use the other to help push the pistons out the sleeves.
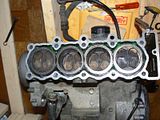
Image

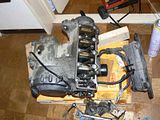
I then removed the pistons - they are secured with split circlips and are removed using beak nosed pliers, look for the indent on the side of them - that's where your pliers fit in and you can get a grip on them. Hopefully the end of the clip will be near this indent if not spin it round until it's a bout 2mm away , once removed you can then push out the gudgeon pins that hold them onto the conrod's not difficult but fiddly - a slightly smaller socket can help you push them through. Ensure you pack clean rags all around the connecting rods in case you drop one. I'm fully stripping the engine so didn't bother.
Image

and that's where i have left it. Head,barrels,cam cap's, pistons and oil cooler are all stored in a sealable box. Engine body is packed up with rags and inside a cardboard box. cam's are inside the house in a shoe box.

As I work on the engine I will add to this thread, clutch removal will be next along with taking the valves out of the head.

Till next time....
Last edited by Mori Man on Thu Nov 20, 2008 10:01 am, edited 2 times in total.
Nothing worse than having an H and not being able to scratch it !
Living life on the edge, SuPposedly
User avatar
masterofinsanity
Site Admin
Site Admin
Posts: 8103
Joined: Thu Aug 29, 2002 12:36 am
My Bike: Aprilia Tuono Fighter
Location: England
Contact:

Re: Engine strip and re-build

Post by masterofinsanity »

fantastic, can i copy this to the main website ??
Don't forget people there is more to the zxr400 than this forum... check out www.zxrworld.co.uk also.
User avatar
Mori Man
Blingmeister
Blingmeister
Posts: 1976
Joined: Thu May 10, 2007 3:30 pm
My Bike: ZXR400J2
Location: JAPAN

Re: Engine strip and re-build

Post by Mori Man »

masterofinsanity wrote:fantastic, can i copy this to the main website ??
No prob's B, just added a wee bit more and checked my grammer :smt001

Better do some better pic's for the next instalment :smt002

Also recommend to use the workshop manual in conjunction with this.
Last edited by Mori Man on Thu Nov 20, 2008 12:08 pm, edited 1 time in total.
Nothing worse than having an H and not being able to scratch it !
Living life on the edge, SuPposedly
cargo
zxr400 oc member
zxr400 oc member
Posts: 3341
Joined: Sat Jan 08, 2005 10:33 am
My Bike: tomos moped
Location: Carrickfergus Northern Ireland

Re: Engine strip and re-build

Post by cargo »

That seems like a reasonable guide.

I would however point out that there is no real need to remove the pistons from the conrods unless there is a particular reason.

Once the head is off the barrel can remain in place and the crankcases can still be split leaving the crank and barrels pistons etc in the top half of the crankcase.
You can even get the crank out and still leave the pistons in the barrel.

In fact in order to save a lot of messing around I rebuild by puting each piston with con rod attached into it bore first then you can lower the top crankcaes into position onto the barrel then set the crank in place and bolt up the rods..........................beats the hell out of trying to wrestle 4 pistons into the barrel at once.
User avatar
Mori Man
Blingmeister
Blingmeister
Posts: 1976
Joined: Thu May 10, 2007 3:30 pm
My Bike: ZXR400J2
Location: JAPAN

Re: Engine strip and re-build

Post by Mori Man »

Top Tip
cargo wrote: ... in order to save a lot of messing around I rebuild by puting each piston with con rod attached into it bore first then you can lower the top crankcaes into position onto the barrel then set the crank in place and bolt up the rods..........................beats the hell out of trying to wrestle 4 pistons into the barrel at once.
However, I will show a top tip for wrestling four pistons back in biggrin

Going for a full strip down C , will be getting the casings dipped clean with sump pan and may knife edge the crank and the rods will get the F3 mods done to them. Pistons will get polished , head flowed and polished, barrels are in limbo??

Clutch will get worked on and I'll see what can be done with the gearbox shocking

Cam's are in great shape same with the cap's , valves out and lapped back in.

Not much really :smt002
Nothing worse than having an H and not being able to scratch it !
Living life on the edge, SuPposedly
User avatar
Scott221
Restricted
Restricted
Posts: 909
Joined: Tue Jan 16, 2007 6:23 pm
My Bike: ZXR400 L9
Location: Bham, U.k

Re: Engine strip and re-build

Post by Scott221 »

Legend, we've been needing guides like this. Do the cam chain now... :smt003
Image
One life, Live it!
User avatar
hciR
zxr400 oc member
zxr400 oc member
Posts: 249
Joined: Wed Aug 23, 2006 9:06 pm
My Bike: zxr 400
Location: Surrey

Re: Engine strip and re-build

Post by hciR »

Some nice detailed pics there, very useful!
User avatar
RedexRobB
Site Admin
Site Admin
Posts: 7212
Joined: Fri Aug 30, 2002 7:37 pm
My Bike: ZXR400L3
Location: Ipswich, Suffolk

Re: Engine strip and re-build

Post by RedexRobB »

This is awsome isnt it! shocking

Keep it coming drew. Be good to get other people comments on hints or tips, even tho i think drew knows what hes doing!
User avatar
Mori Man
Blingmeister
Blingmeister
Posts: 1976
Joined: Thu May 10, 2007 3:30 pm
My Bike: ZXR400J2
Location: JAPAN

Re: Engine strip and re-build

Post by Mori Man »

Scott221 wrote: Do the cam chain now... :smt003
Are you looking for, replacing the cam chain or checking the valve clearances and changing shims?

If the weather holds up I'll ask the wife to come out with the camera and take snaps of me doing either with the engine that's still in the bike frame. That way it'll feel a bit more familiar to you :smt002 Have to say though - I wont be replacing the camchain as there's nowt up with mine.

MM! :smt001
Nothing worse than having an H and not being able to scratch it !
Living life on the edge, SuPposedly
User avatar
masterofinsanity
Site Admin
Site Admin
Posts: 8103
Joined: Thu Aug 29, 2002 12:36 am
My Bike: Aprilia Tuono Fighter
Location: England
Contact:

Re: Engine strip and re-build

Post by masterofinsanity »

you could just take it out and put it back in, amuse us :smt003
Don't forget people there is more to the zxr400 than this forum... check out www.zxrworld.co.uk also.
Deswilkie
Posts: 127
Joined: Fri May 08, 2009 2:11 pm
My Bike: ZXR400L, Trumpet 675

Re: Engine strip and re-build

Post by Deswilkie »

Brilliant instructions and photos definetly helped me. Cheers. As much as i've serviced engines and replaced whole units i've never before started to strip the block. This was a really hand post for me removing the head to get it skimmed and ported. Couple of small things for folk about to embark on the same thing.

Time; set aside more time that you think so as not to rush.
Tools; long reach 5mm (or T-bar) for the bolt down the cam chain conduit and 1/4" socket set as 1/2" is too big to get in certain spaces.
Shims; take them out (I used a magnetic screwdriver to get them out) and selotape them to a piece of card marking what order they're to go back in.
Post Reply