how to set up your carbs
Posted: Wed Jul 31, 2013 10:29 am
Ok, the idea of this post is to show people how to set up their carbs. all the specs i will be using are standard out of the manual, though i will say at what points how to richen or lean out each part of the carb circuit. Please use in conjunction with the manuals http://www.zxrworld.co.uk/zxr400/manual.html and Banners excellent carb cleaning guide viewtopic.php?f=115&t=14018
-This is a guide ONLY! I will not be held responsible for any damage caused to your bike by following this guide. It is intended to show you the basics of how to set up your carbs. if you do not feel confident take them or the bike to a mechanic. I will try to say where there are advisable methods or risk of damage.
Right onto the actual guide-
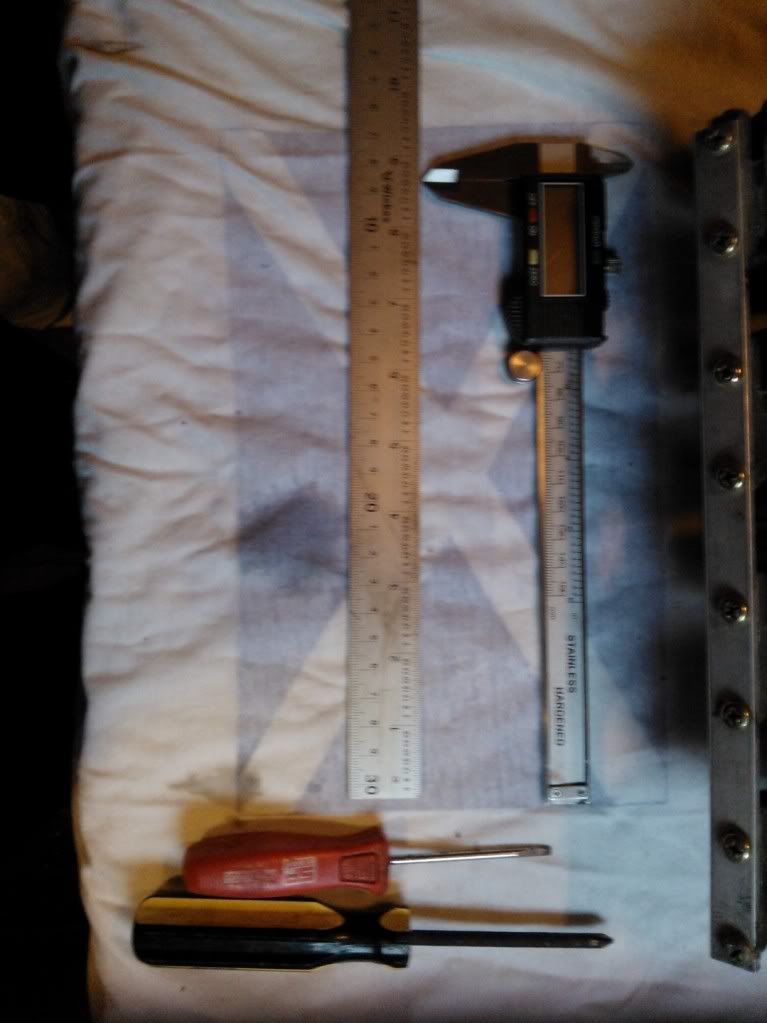
Tools;
-Flathead screwdriver (may need a couple of sizes to avoid damage, though i did with one)
-Phillips screwdriver (The bolts used on the carbs are JIS, it is advisable to get a JIS screwdriver to avoid damage of the bolts)
-Vernier caliper or ruler
-10mm spanner
Other parts you may need to change;
-Main jets- The specific size will depend on what is already being used
-M3 washers- these can be used to richen the needles unless you have Dynojet needles which have an E-clip
-you may also need to replace certain seals or the float valve, float valves can be purchased from cradley kawasaki or online. seal kits can be bought off here from maelstrom viewtopic.php?f=115&t=14830 i can vouch for these seals, they are very high quality and i recommend changing the seals if you want your carbs perfect.
i am presuming that you already have the carbs off, disconnected and drained of fuel
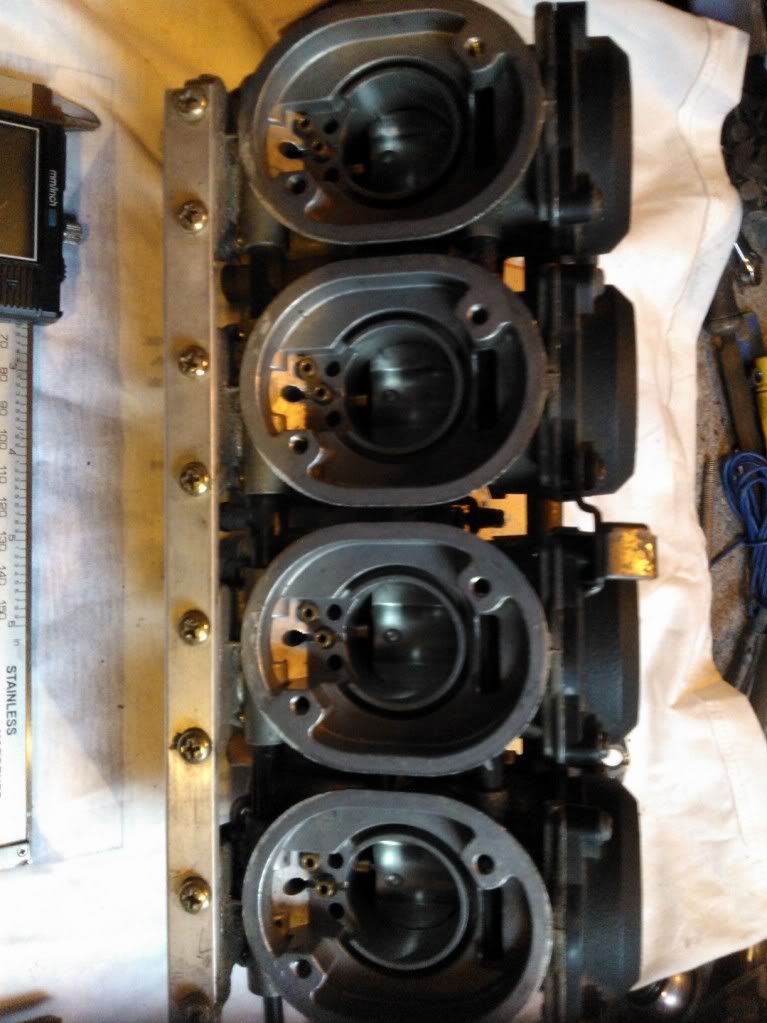
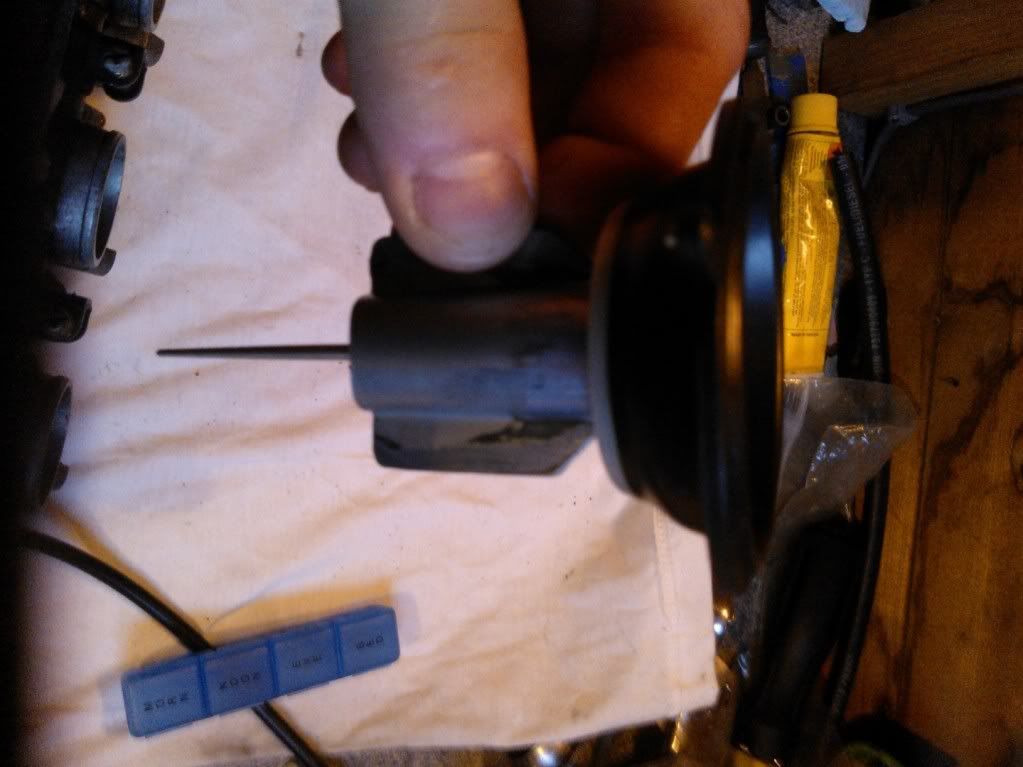
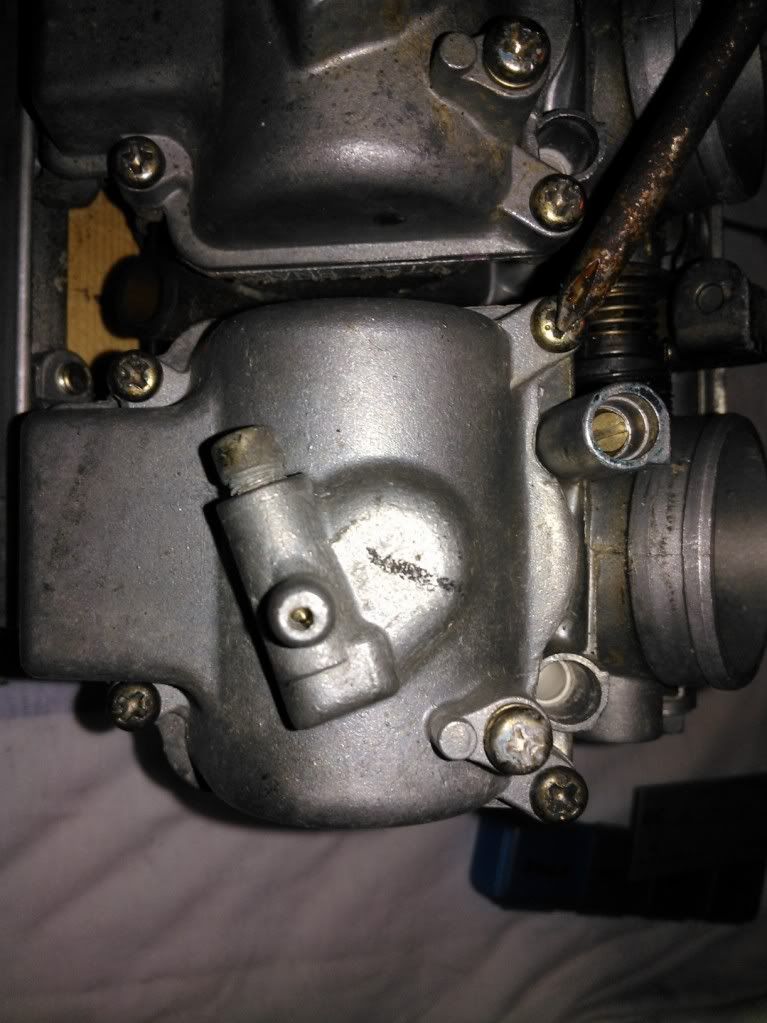
To change the needle height you will need to remove the top black vacuum cover by removing these phillips screws
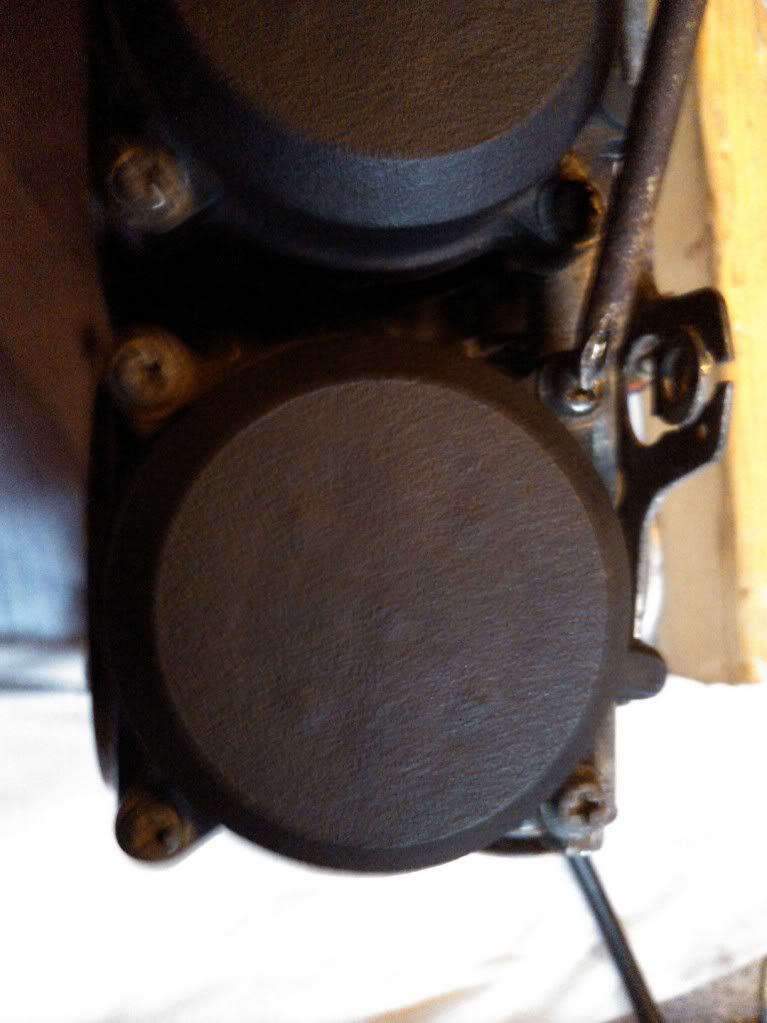
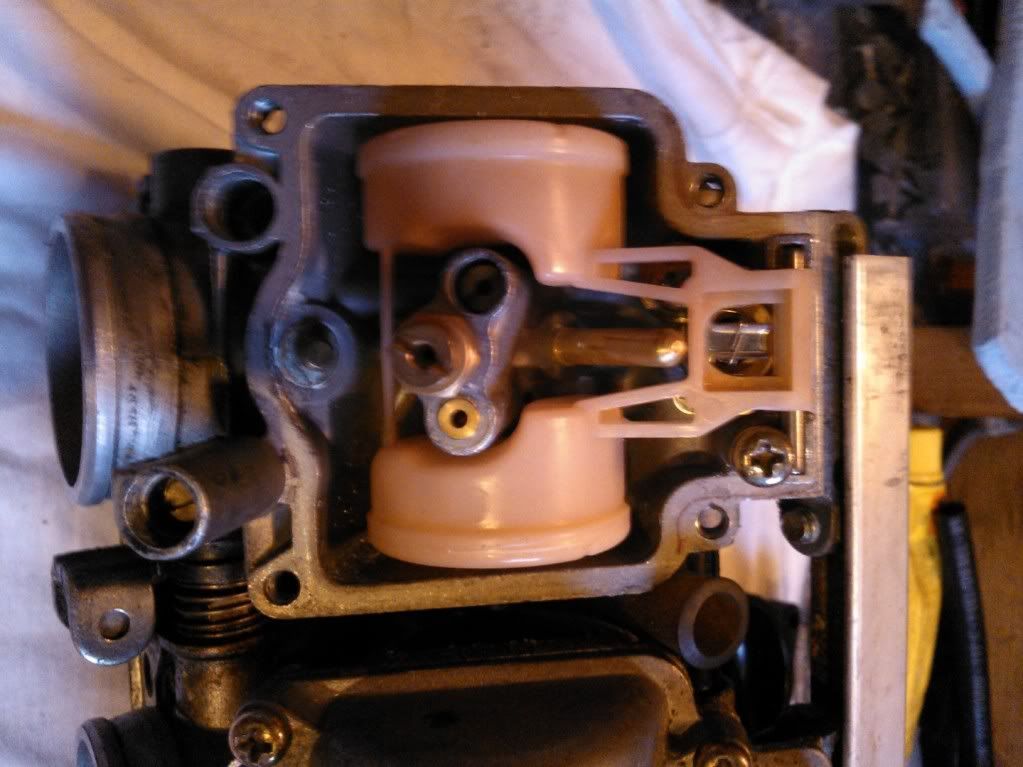
once you have removed this cover this is what you should see
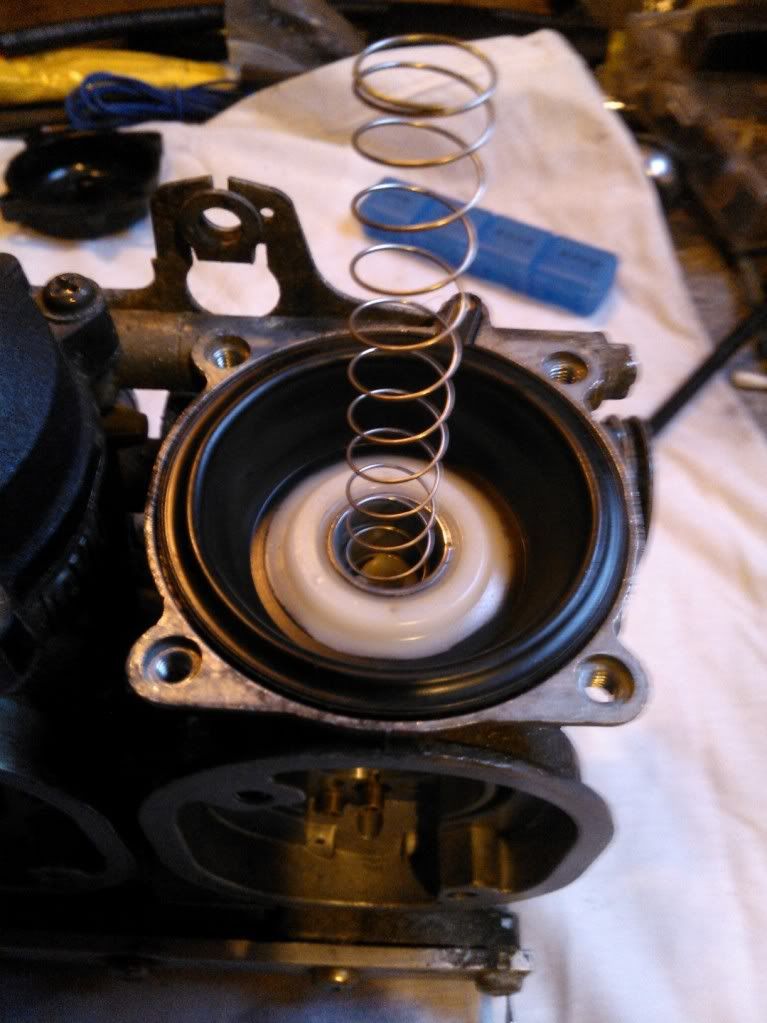
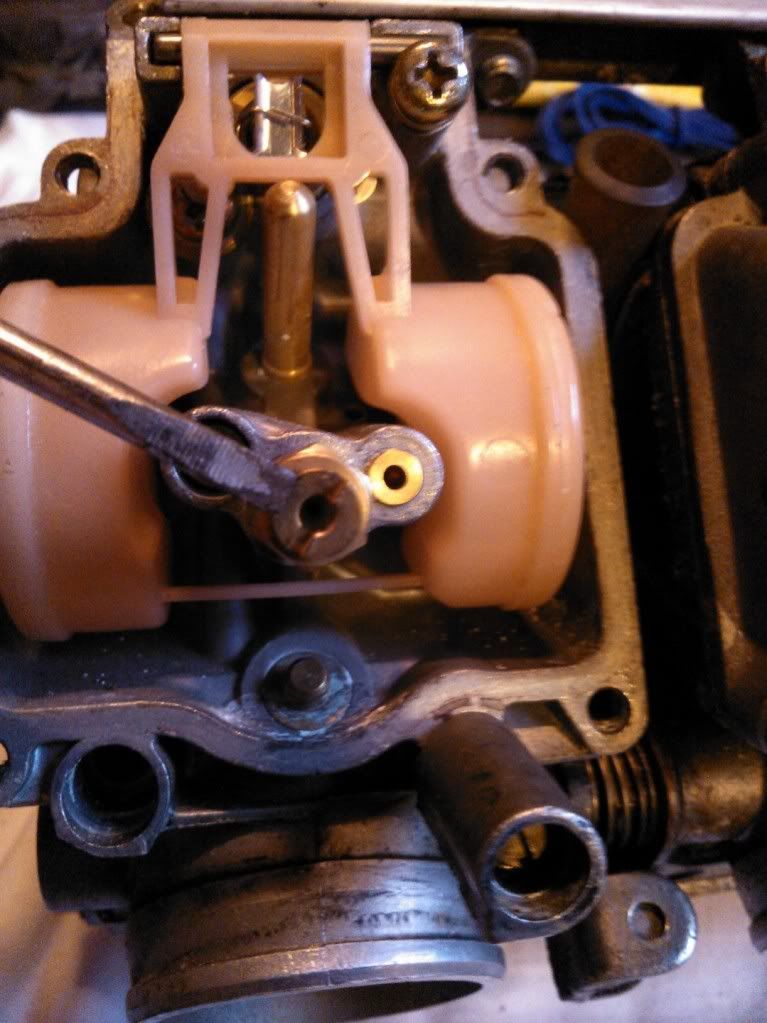
carefully lift out the slide by removing the edge of the rubber out of its groove, being careful not to damage it (there should be a spring resting in here like in the picture below, but i remove the spring first, but you can do it either way)
once this is removed this is what you should have
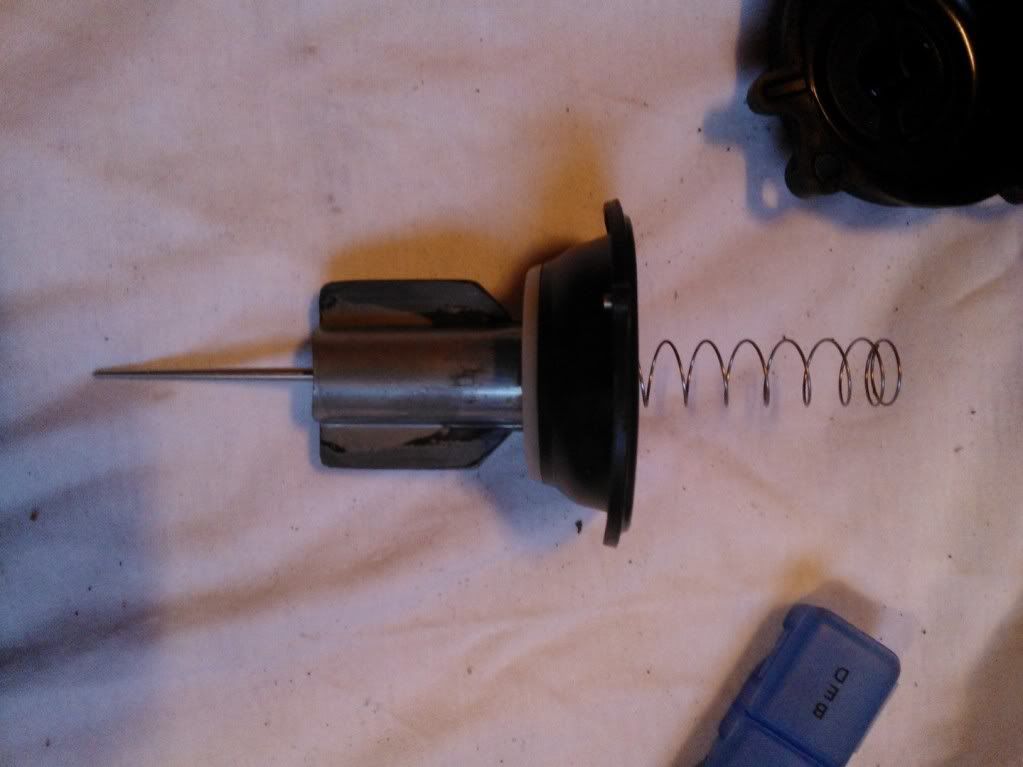
check the rubber for any damage, tears etc.
remove the spring, the plastic bit that covers the needle may come out with it

you should now have a slide with a needle resting inside it
now turn it carefully upside down to remove the needle, the needle may have some washers on it as this is used to richen the midrange (by putting on more washers you raise the needle height therefore allowing more fuel through)
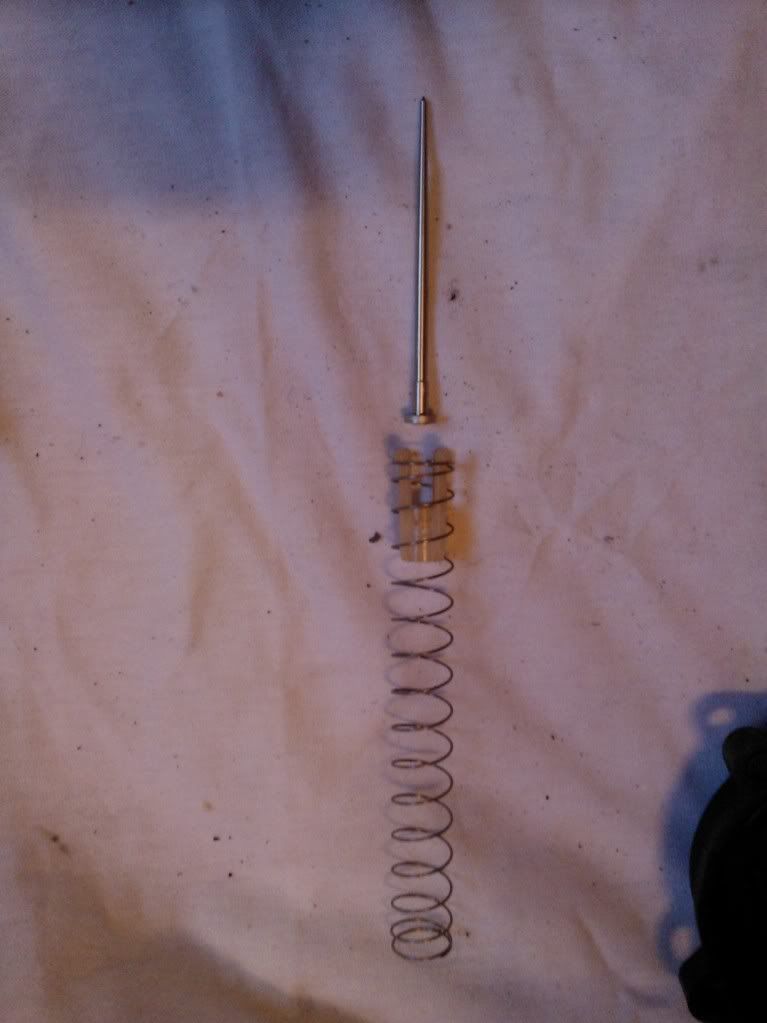
to richen the midrange add an m3 washer, to lean out remove one (if yours has washers to begin with, if not you will have to change the main jet to a smaller size)
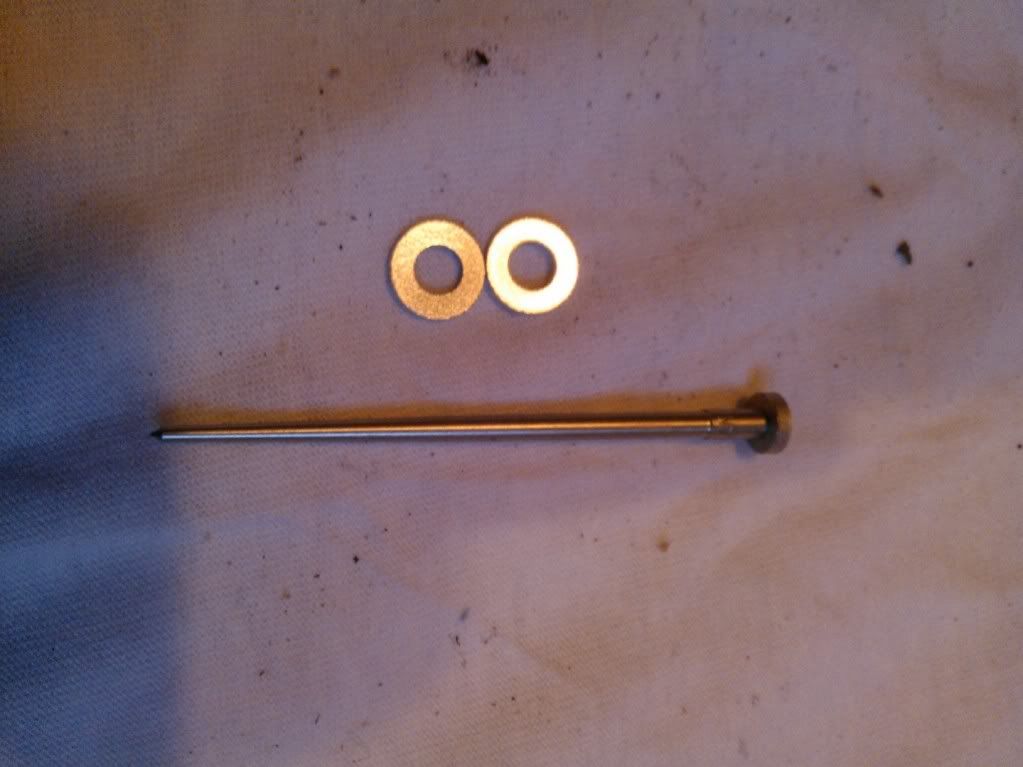
check all of the needles for damage and that they are all set at the same height
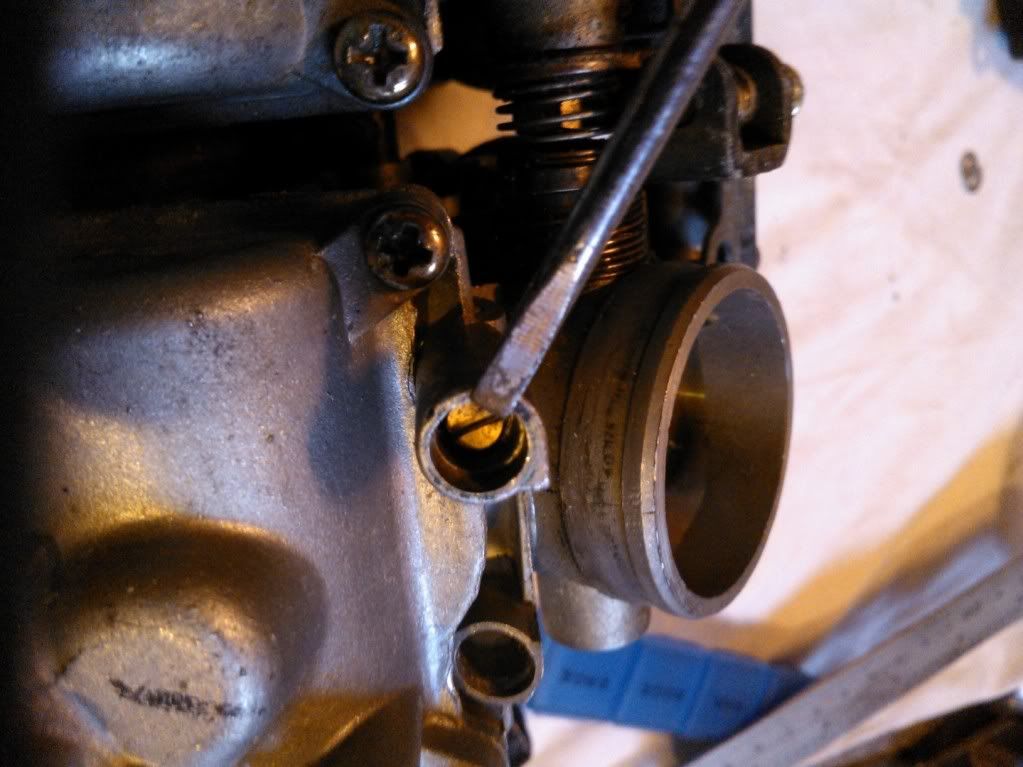
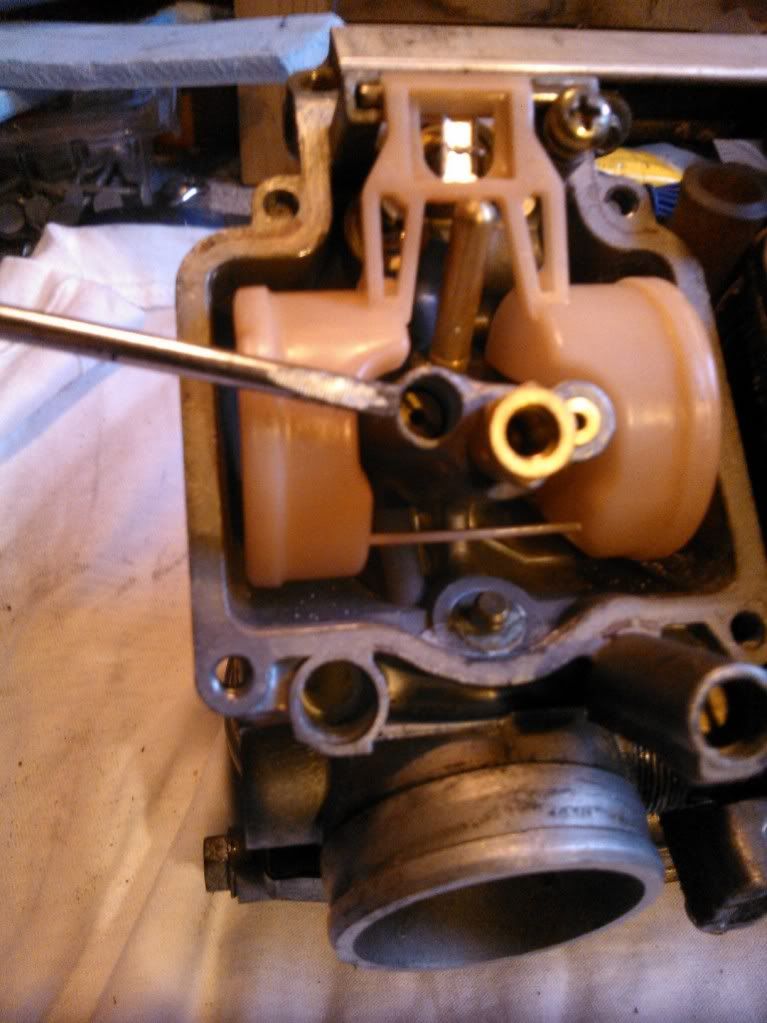
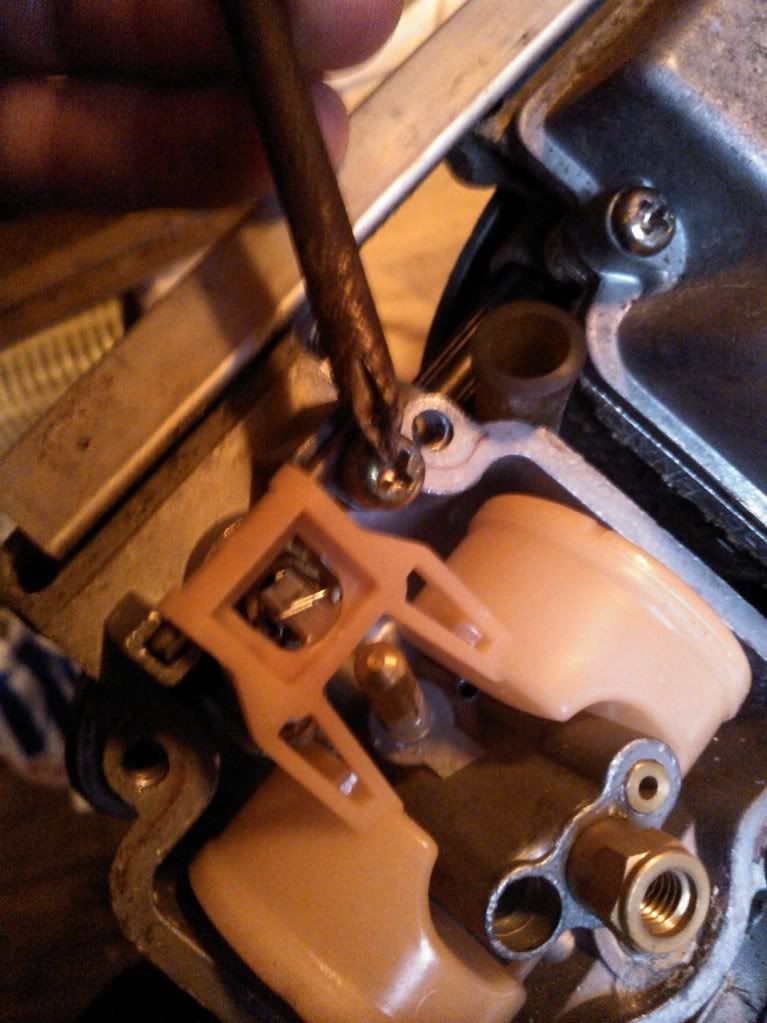
to change the pilot circuit you will need to turn this screw using a flathead screwdriver, only do this by 1/8 turn at a time as the pilot circuit is sensitive to changes ( turn in to richen, turn out to lean) standard for L models is between 1 1/2 and 1/3/4 from a fully clockwise seated position (lightly seated!)
now to get to the floats, main jet and pilot jet you will need to remove the float bowl. to do this you will need to remove these phillips screws
this is what you should see with the float bowl removed
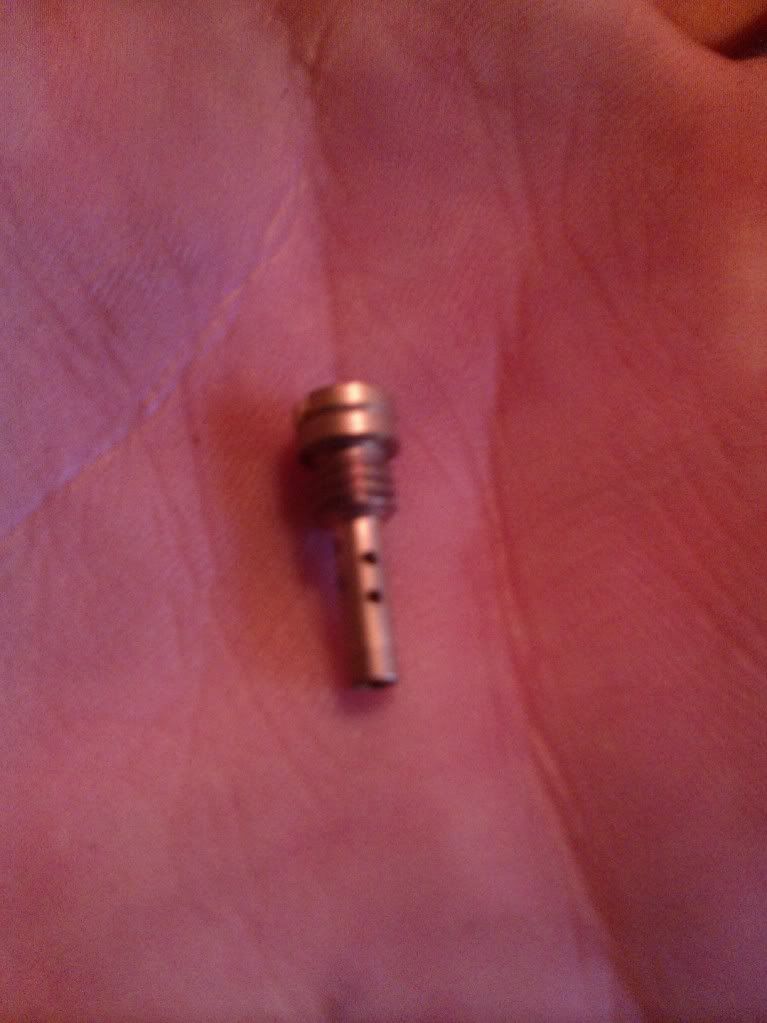
this is your main jet, to change simply unscrew with a flathead screwdriver, (be careful when removing the main jet and use the correct size screwdriver to avoid damaging the soft brass) and screw the new one in. the needle jet holder may come out with it, if it does simply use a 10mm spanner to hold it while you unscrew the main jet.
standard size main jets for L models are 90, with 92, 95, 98 and 100 also used, though anything may be used depending on your bike
to richen top end put in a larger main jet, to lean out, put in a smaller main jet (larger and smaller refer to the numbers on the main jet)
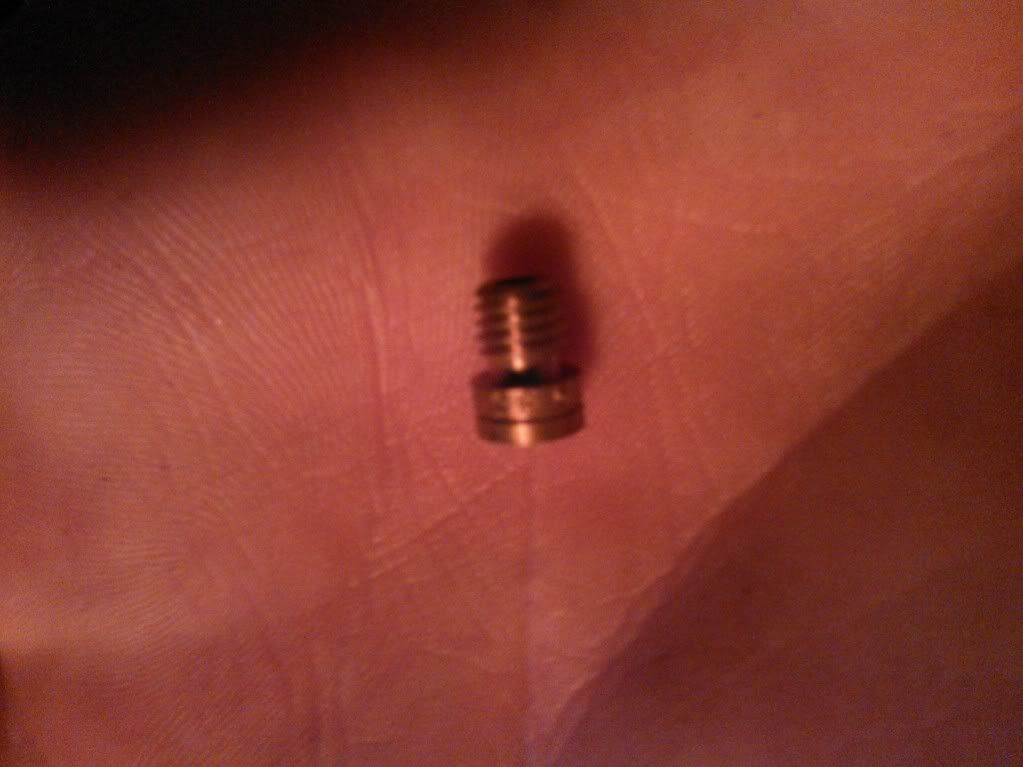
this is your pilot jet, it is very rare that this will need to be changed though may need to be removed for cleaning. to remove simply unscrew with a flathead screwdriver
this is what it looks like when removed
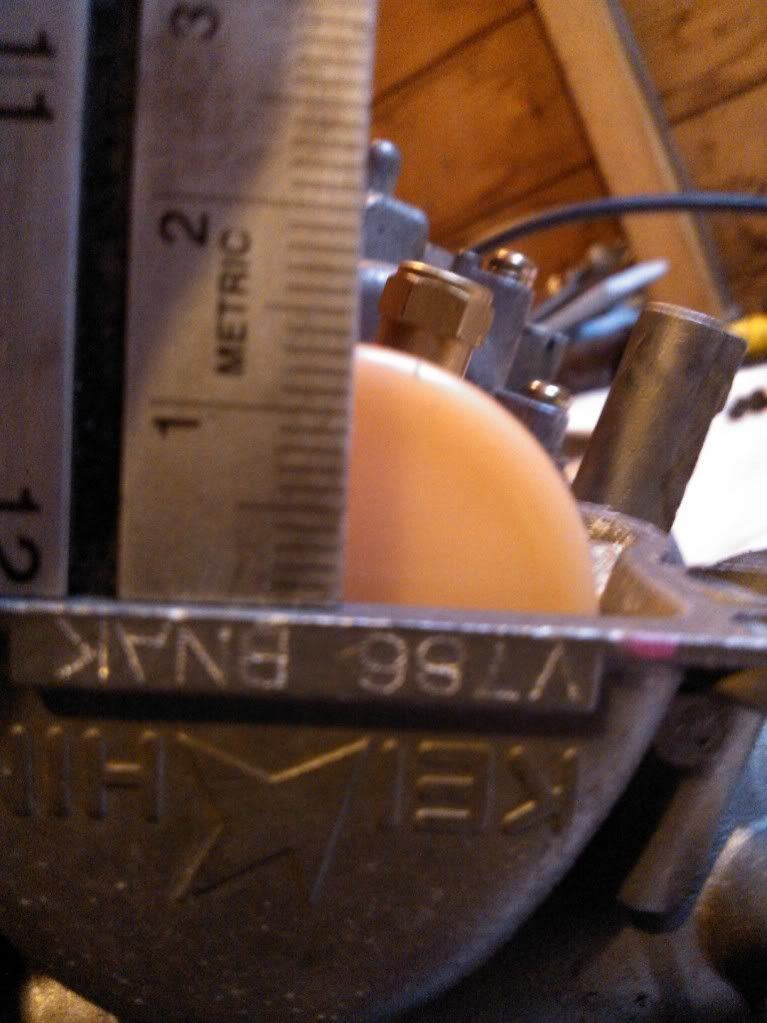
now to check your float height rest the carbs upside down like so
you want the float to be just resting, gently tap it down with your finger and it should spring back up
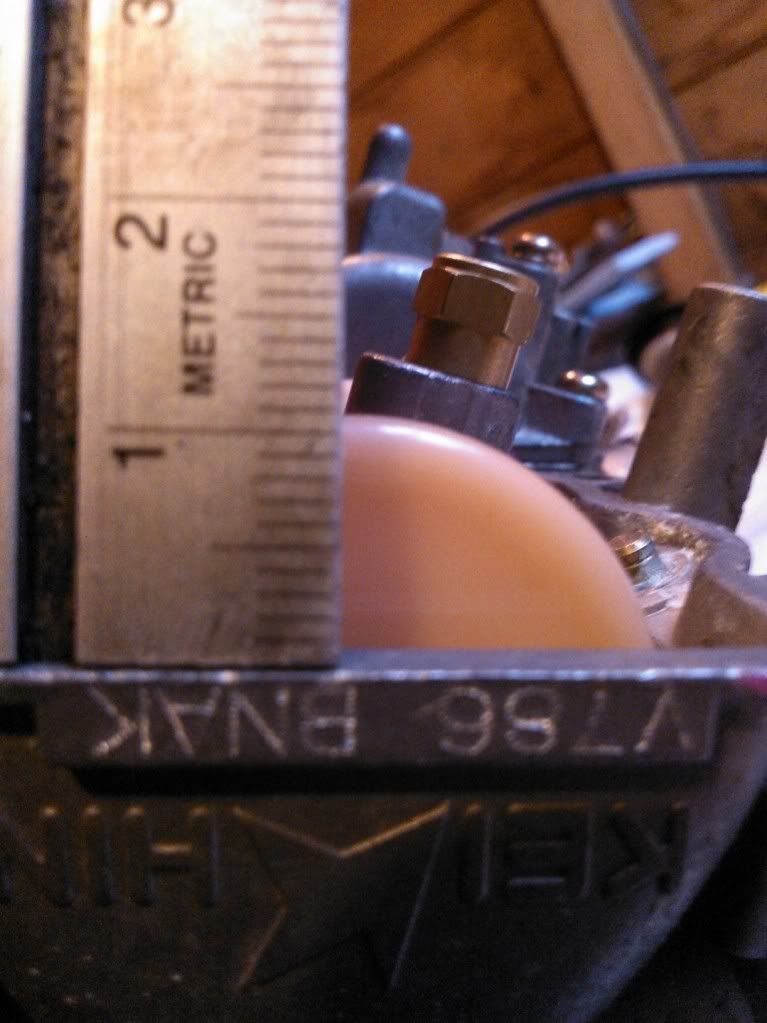
now using either a ruler or vernier, measure from the gasket surface to the highest point on the float (as you can see this is around 14mm)
to change the float height (standard for L models is 11mm +- 2mm) remove this screw (float height can be changed without removal but this allows you to check the condition of the rubber tip for damage, if there is any tears or indentations on the rubber tip then replace)
then you can remove the assembly
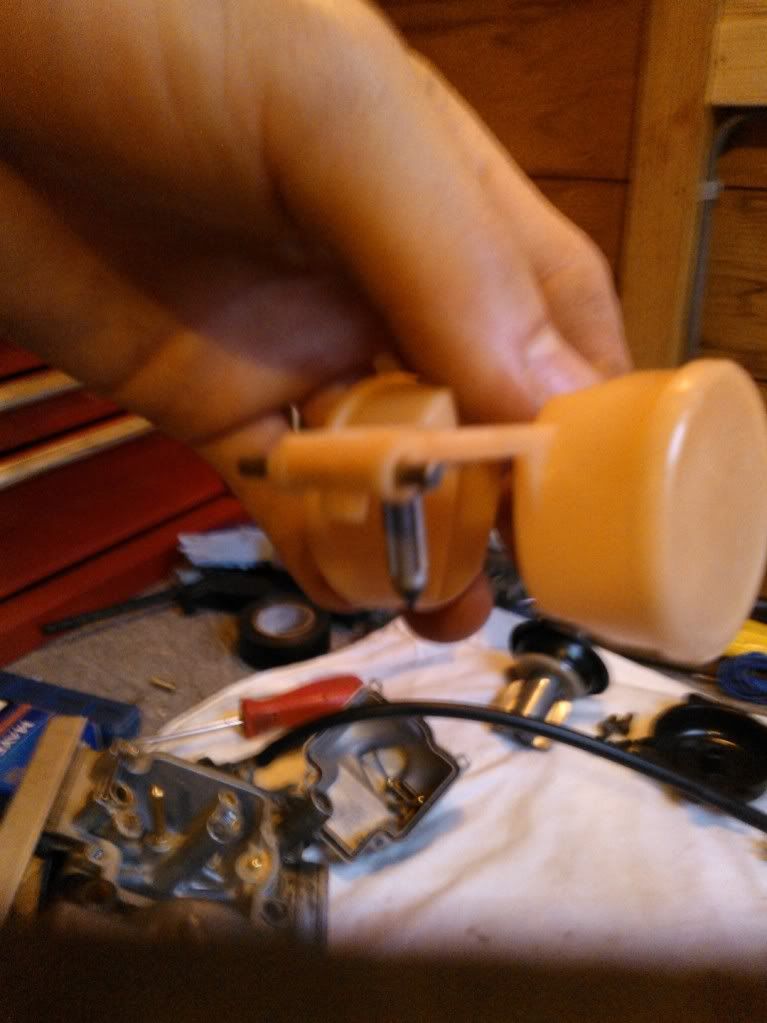
to change the float height you will need to carefully bend this metal tang, it doesnt need much to change the float height (the float can be used to change the fuelling altough this is not normally required, but just incase, to richen, decrease the height of the float e.g. from 11mm to 10mm and to lean increase the float height e.g. 11mm to 12mm)
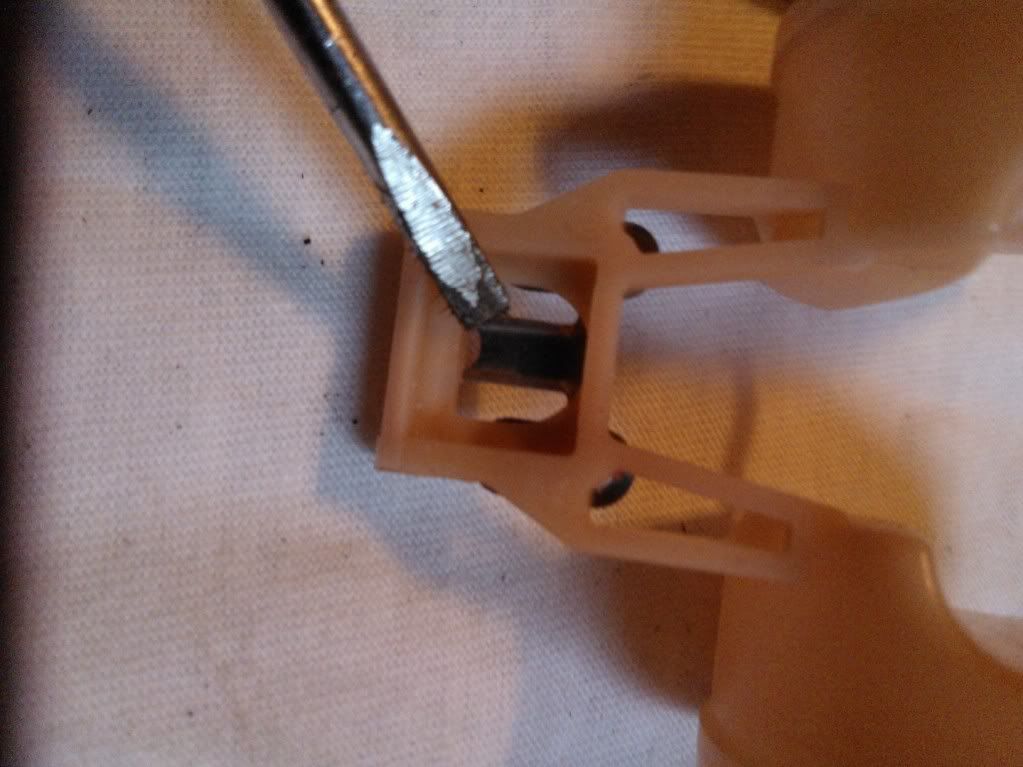
now put the float back in with the float valve spring in its hole and put the phillips screw back in. now re-measure the float height again as outlined before, remeber you are aiming for 11mm for standard settings.
put the float bowl back on by re inserting the four Philips screws
repeat for all 4 carbs and floats
reassemble the carbs and you should have a set of carbs set back to standard or changed to suit your bikes fuelling needs. after this balance the carbs (there is a guide in the workshop section on the main site)
for clearness, standard settings for L model are
main jet- 90 (92, 95, 98 and 100 also used)
needle height- no washers
float height- 11mm +-2mm
pilot jet- 35
pilot screws- 1 1/2-1 3/4 turn from the clockwise seated position
i hope this helps, if you have any questions or suggestions please ask/say
-This is a guide ONLY! I will not be held responsible for any damage caused to your bike by following this guide. It is intended to show you the basics of how to set up your carbs. if you do not feel confident take them or the bike to a mechanic. I will try to say where there are advisable methods or risk of damage.
Right onto the actual guide-
Tools;
-Flathead screwdriver (may need a couple of sizes to avoid damage, though i did with one)
-Phillips screwdriver (The bolts used on the carbs are JIS, it is advisable to get a JIS screwdriver to avoid damage of the bolts)
-Vernier caliper or ruler
-10mm spanner
Other parts you may need to change;
-Main jets- The specific size will depend on what is already being used
-M3 washers- these can be used to richen the needles unless you have Dynojet needles which have an E-clip
-you may also need to replace certain seals or the float valve, float valves can be purchased from cradley kawasaki or online. seal kits can be bought off here from maelstrom viewtopic.php?f=115&t=14830 i can vouch for these seals, they are very high quality and i recommend changing the seals if you want your carbs perfect.
i am presuming that you already have the carbs off, disconnected and drained of fuel
To change the needle height you will need to remove the top black vacuum cover by removing these phillips screws
once you have removed this cover this is what you should see
carefully lift out the slide by removing the edge of the rubber out of its groove, being careful not to damage it (there should be a spring resting in here like in the picture below, but i remove the spring first, but you can do it either way)
once this is removed this is what you should have
check the rubber for any damage, tears etc.
remove the spring, the plastic bit that covers the needle may come out with it
you should now have a slide with a needle resting inside it
now turn it carefully upside down to remove the needle, the needle may have some washers on it as this is used to richen the midrange (by putting on more washers you raise the needle height therefore allowing more fuel through)
to richen the midrange add an m3 washer, to lean out remove one (if yours has washers to begin with, if not you will have to change the main jet to a smaller size)
check all of the needles for damage and that they are all set at the same height
to change the pilot circuit you will need to turn this screw using a flathead screwdriver, only do this by 1/8 turn at a time as the pilot circuit is sensitive to changes ( turn in to richen, turn out to lean) standard for L models is between 1 1/2 and 1/3/4 from a fully clockwise seated position (lightly seated!)
now to get to the floats, main jet and pilot jet you will need to remove the float bowl. to do this you will need to remove these phillips screws
this is what you should see with the float bowl removed
this is your main jet, to change simply unscrew with a flathead screwdriver, (be careful when removing the main jet and use the correct size screwdriver to avoid damaging the soft brass) and screw the new one in. the needle jet holder may come out with it, if it does simply use a 10mm spanner to hold it while you unscrew the main jet.
standard size main jets for L models are 90, with 92, 95, 98 and 100 also used, though anything may be used depending on your bike
to richen top end put in a larger main jet, to lean out, put in a smaller main jet (larger and smaller refer to the numbers on the main jet)
this is your pilot jet, it is very rare that this will need to be changed though may need to be removed for cleaning. to remove simply unscrew with a flathead screwdriver
this is what it looks like when removed
now to check your float height rest the carbs upside down like so
you want the float to be just resting, gently tap it down with your finger and it should spring back up
now using either a ruler or vernier, measure from the gasket surface to the highest point on the float (as you can see this is around 14mm)
to change the float height (standard for L models is 11mm +- 2mm) remove this screw (float height can be changed without removal but this allows you to check the condition of the rubber tip for damage, if there is any tears or indentations on the rubber tip then replace)
then you can remove the assembly
to change the float height you will need to carefully bend this metal tang, it doesnt need much to change the float height (the float can be used to change the fuelling altough this is not normally required, but just incase, to richen, decrease the height of the float e.g. from 11mm to 10mm and to lean increase the float height e.g. 11mm to 12mm)
now put the float back in with the float valve spring in its hole and put the phillips screw back in. now re-measure the float height again as outlined before, remeber you are aiming for 11mm for standard settings.
put the float bowl back on by re inserting the four Philips screws
repeat for all 4 carbs and floats
reassemble the carbs and you should have a set of carbs set back to standard or changed to suit your bikes fuelling needs. after this balance the carbs (there is a guide in the workshop section on the main site)
for clearness, standard settings for L model are
main jet- 90 (92, 95, 98 and 100 also used)
needle height- no washers
float height- 11mm +-2mm
pilot jet- 35
pilot screws- 1 1/2-1 3/4 turn from the clockwise seated position
i hope this helps, if you have any questions or suggestions please ask/say