Measuring Valve Clearances.

This forum is for informative threads, if you feel a topic should be in here then let us know and we will move it.

Moderator: Moderators

User avatar
carsounds_dan
L-plate hell
L-plate hell
Posts: 268
Joined: Mon Aug 06, 2007 10:07 pm

Measuring Valve Clearances.

Post by carsounds_dan »

Right here is a quick guide for those wanting to adjust their valve clearances. I take no responsibility for any damaged caused by people following the advice given below but I found the information below correct for my needs.
You need to start by making sure the bike is at room temperature to start with, so taking measurements with a cold engine in your garage will be fine. I then got my bike up onto the ABBA stand I have, but not essential, all work on the bike is easier if it's upright though.
Start by removing the two hoover pipes by un-clipping them from the tank cover, and removing the tank cover by removing the three M5 screws/bolts. From there you need to get the tank off, which has two 10mm bolts under the front seat and two hexagonal bolts at the front of the tank. Also need to remove the fuel tap, which has a screw in the centre of it. To get the tank off from there I simple pulled the rear side fairings apart enough for their retaining clips to come loose and pulled the tank upwards. Turn your fuel tap to off and crank the engine a couple of times to pull most of the fuel through, then remove the fuel line from the tank. From there you need to take the airbox off, which has 8, 10mm bolts, two of which are under rubber gromets in the airbox, also remove the breather pipe from the airbox. The airbox just pulls off the carbs, to stop objects falling into the carbs I stuffed tissue into the bellmouths.
From there I unplugged all the connectors that are above the cylinder head and removed the two bolts holding on each coil and pulled the plug connectors out of the cylinder block (pull the hard plastic bit not the cable). Also remove the right hand fairing panel and the coolant expansion tank, if you undo the two top radiator bolts (either side of the bottom of the headstock) the rad will rock forward taking the plastic cover half covering the head with it.
You should now see the rocker cover in all it's glory. Remove the 4 10mm bolts in a criss-cross fashion.
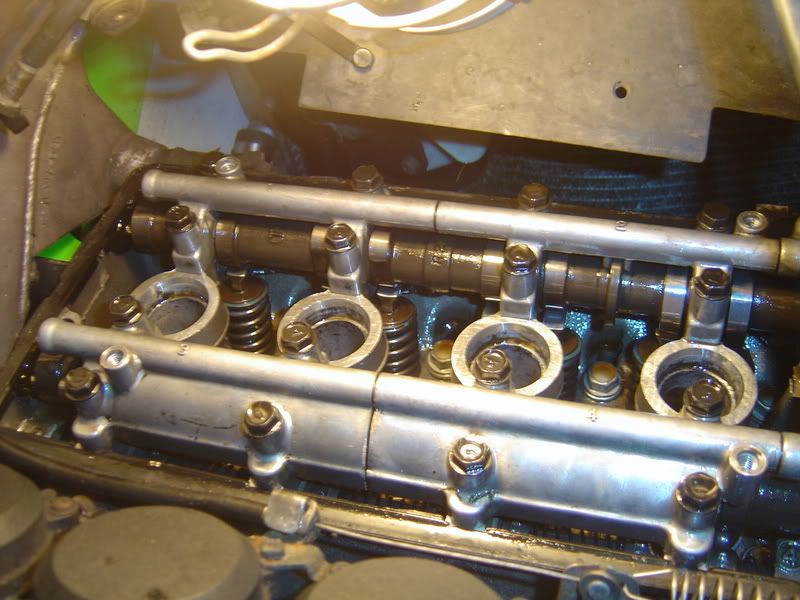
Pull off the rocker cover carefully and lever it out from within the frame, avoiding the throttle and choke cables if needed. Pull out the 4 little metal guides that sit ontop of the spark plug holes (might need a little rocking side to side).
You should now have...
Image
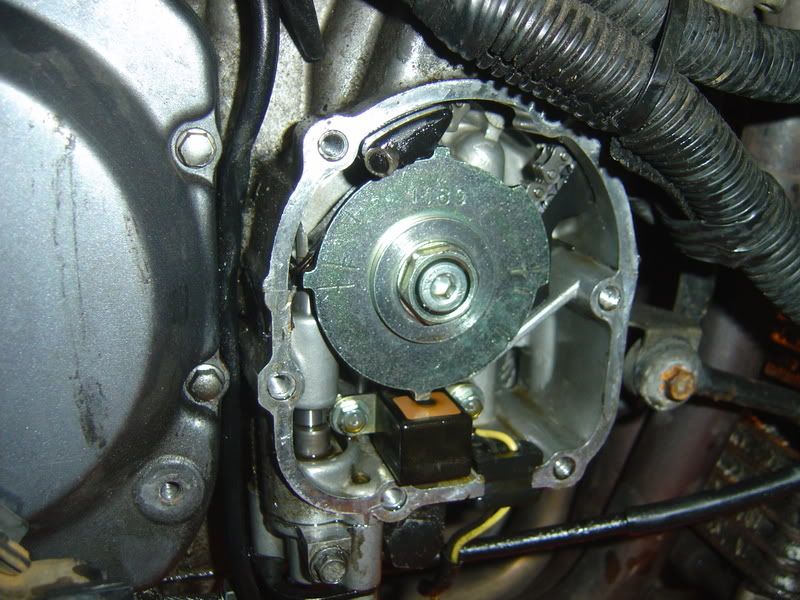
From this you will also need to take the pickup coil cover off to get the timing right to measure your clearances correctily. Follow the manuals available from the http://www.zxrworld.co.uk website to work out the correct timing and which valves to measure at which time. But basically your pickup should look like...
Image
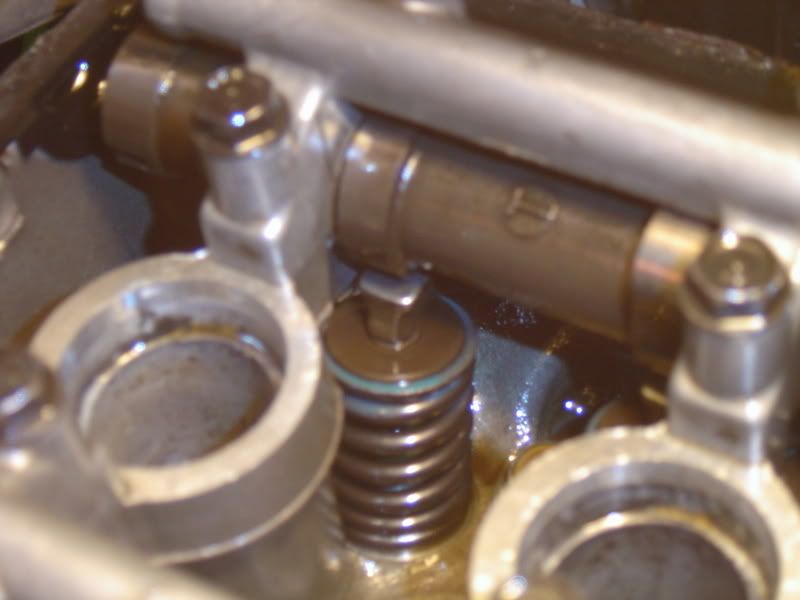
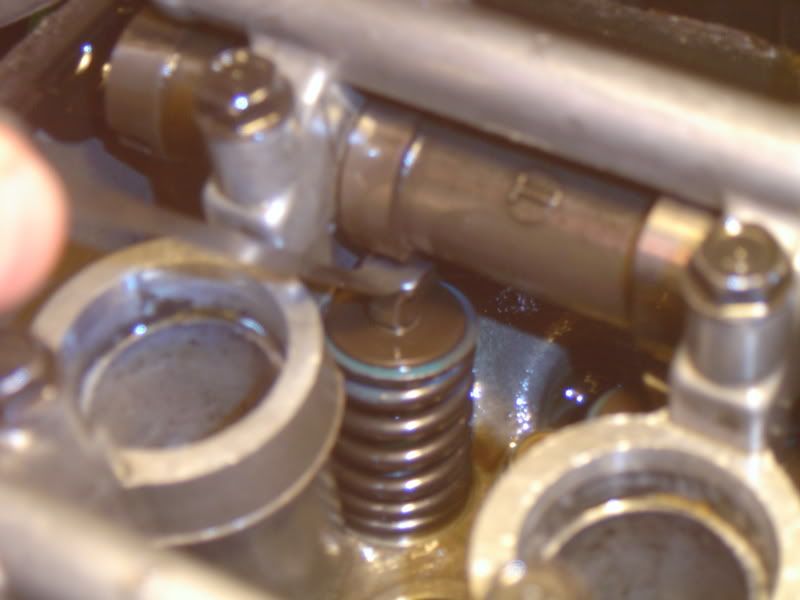
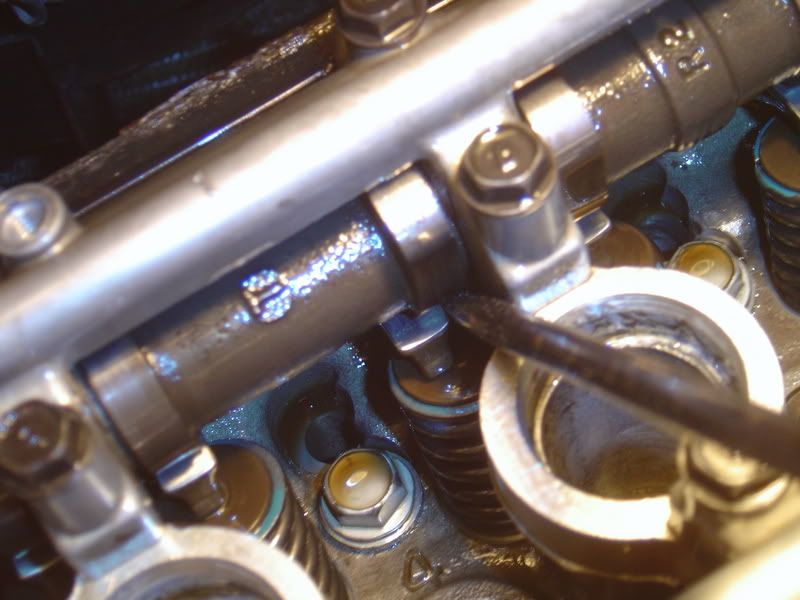
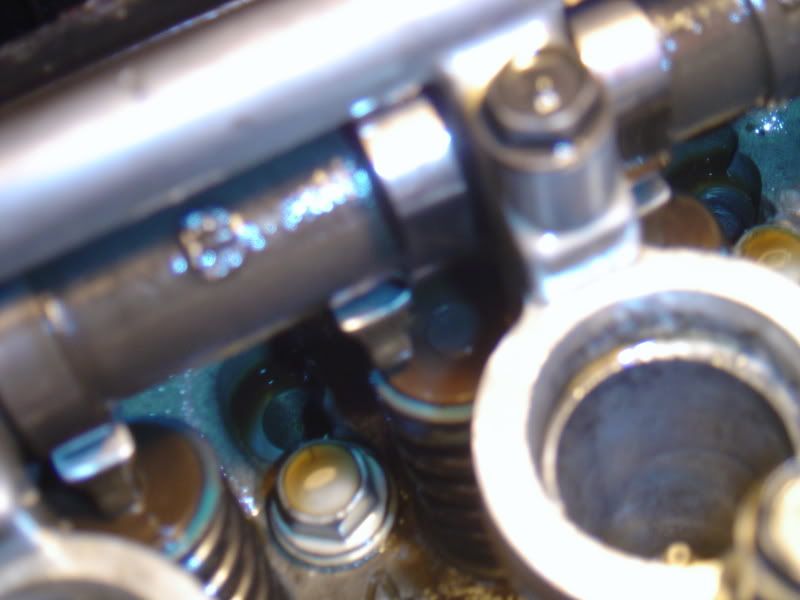
Then you will need to take a measurement, the exact sizes are again in the manual but use feeler gauges between the cam and the rocker to measure them correctly. If you need a size you don't have you will need to put some together [i.e. I didnt have a 0.23 mm gauge, so I used a 0.08mm and 0.15mm together to reach the 0.23mm size]. It should look a bit like this (first picture for comparison)
Image
Image
Now take note of your measurements and compare them to the measurements within the manual, if they are 0.01mm I personally wouldnt worry about them but beware, bigger is much better than smaller. If your measurements are out then you will need a different sized shim. If your clearance is too small you will need a smaller shim and if your clearance is too big you will need a bigger shim; these shims usually come in 0.05mm incriments and are about £6.32 from your local kawasaki dealer. But before you need to worry about that you need to take the shim out.
Below is how...
Get the cams in the right possition to measure the clearance on that valve, the follower will then just lever left or right dependant on which follower it is, if you've got this far you'll be able to work it out.
Image
you should get this sight
Image
then a magnet is handy to get it out, i used a small magnetic wand but a small magnet superglued to the end of a small wooden dowl would do the job.
To put the shim back in I was advised by a Kawasaki dealer to rub a strong magnet against a screwdriver, put a dab of grease on the screwdriver and then attach the shim. Now be careful with the shims on cylinder 4 if they fall down the side of the engine they can be a right bitch to get back and shims loose in your engine is NOT good. Then you need to re-measure the clearance and if all is ok re-assemble everything as per the workshop manuals.
Now if anyone want to add to this its fine but good luck and if you don't feel up to it get someone else to do it, there is no point on f**king it up for £100 of labour.
Hope all is alright and keep rubber side down
;)
cheers
dan
The bike only goes as fast as you want it to...
...i know, it's great :D
User avatar
masterofinsanity
Site Admin
Site Admin
Posts: 8103
Joined: Thu Aug 29, 2002 12:36 am
My Bike: Aprilia Tuono Fighter
Location: England
Contact:

Re: Measuring Valve Clearances.

Post by masterofinsanity »

nice one mate, ok to add this to the workshop on the main site?
Don't forget people there is more to the zxr400 than this forum... check out www.zxrworld.co.uk also.
User avatar
carsounds_dan
L-plate hell
L-plate hell
Posts: 268
Joined: Mon Aug 06, 2007 10:07 pm

Re: Measuring Valve Clearances.

Post by carsounds_dan »

fine with me, but wait for people to cargo to slate it first :P
cheers
dan
The bike only goes as fast as you want it to...
...i know, it's great :D
cargo
zxr400 oc member
zxr400 oc member
Posts: 3341
Joined: Sat Jan 08, 2005 10:33 am
My Bike: tomos moped
Location: Carrickfergus Northern Ireland

Re: Measuring Valve Clearances.

Post by cargo »

Looks fine to me

Only a couple of things to add

Remember to use the proper torque setting for tightening bolts/screws

And I have never found a good set of metric feeler guages so I always work in imperial when doing clearances. Make sure you don't mix them up.

The top right screw holding the ingnition cover on extends into an oil cavity so it needs a sealing washer or sealant on the threads

Double check to make sure you have a replacment shim back in place properly

A vernier guage is useful for measuring old shims as the markings often are worn off

And if your still concerned and you live near me I'll do it for a lot less than £100.


As an extra Dan I notice you have the old style cam chain tensioner on your bike so it must be L3 or older ?
I've recently discovered that the new style tensioner is a direct replacement for it.


Good job Dan well done think of all the money your saving people they should pay you a consulatancy fee :smt003
User avatar
masterofinsanity
Site Admin
Site Admin
Posts: 8103
Joined: Thu Aug 29, 2002 12:36 am
My Bike: Aprilia Tuono Fighter
Location: England
Contact:

Re: Measuring Valve Clearances.

Post by masterofinsanity »

i shall await responses
Don't forget people there is more to the zxr400 than this forum... check out www.zxrworld.co.uk also.
User avatar
carsounds_dan
L-plate hell
L-plate hell
Posts: 268
Joined: Mon Aug 06, 2007 10:07 pm

Re: Measuring Valve Clearances.

Post by carsounds_dan »

definately worth checking your feeler gauges, my 0.2mm gauge actually showed up as a 0.28mm in my reliable micrometer.
Also check your cam followers whilst your at it, I didn't check mine and I'm taking her apart later again to check them coz she's still rattling away like a good'n.
cheers
dan
The bike only goes as fast as you want it to...
...i know, it's great :D
cargo
zxr400 oc member
zxr400 oc member
Posts: 3341
Joined: Sat Jan 08, 2005 10:33 am
My Bike: tomos moped
Location: Carrickfergus Northern Ireland

Re: Measuring Valve Clearances.

Post by cargo »

I've got a cylinder head and the followers or rockers are well worn
once the case hardening is gone they don't last much longer

That rattle you have could well be a dodgy cam chain tensioner................I was amazed to find how such a small bit of missing metal could cause one to fail
User avatar
RedexRobB
Site Admin
Site Admin
Posts: 7212
Joined: Fri Aug 30, 2002 7:37 pm
My Bike: ZXR400L3
Location: Ipswich, Suffolk

Re: Measuring Valve Clearances.

Post by RedexRobB »

Thats absolutley excellent dan, well done!
User avatar
carsounds_dan
L-plate hell
L-plate hell
Posts: 268
Joined: Mon Aug 06, 2007 10:07 pm

Re: Measuring Valve Clearances.

Post by carsounds_dan »

found out what my rattle was... it was the 1st inlet follower of piston one. Changed it by taking out the front engine bolts and the one by the fuel pump and swinging the engine forward in the frame using the chain adjuster block to get it to the right place to get to the rocker shafts. I have two other rockers with the hardening chipping in the dead centre so I'm getting them replaced at the weekend. Only took me 2.5 hours to get the bike from fully faired and running to stripped and rockers out.
anyways, more pictures and a tutorial on how to do the rockers coming soon....
cheers
dan
The bike only goes as fast as you want it to...
...i know, it's great :D
User avatar
carsounds_dan
L-plate hell
L-plate hell
Posts: 268
Joined: Mon Aug 06, 2007 10:07 pm

Re: Measuring Valve Clearances.

Post by carsounds_dan »

load it on up mr man.
you have my full permission to put it on the workshop part of the main site.
cheers
dan
The bike only goes as fast as you want it to...
...i know, it's great :D
User avatar
masterofinsanity
Site Admin
Site Admin
Posts: 8103
Joined: Thu Aug 29, 2002 12:36 am
My Bike: Aprilia Tuono Fighter
Location: England
Contact:

Re: Measuring Valve Clearances.

Post by masterofinsanity »

well thankyou kind sir :smt003
Don't forget people there is more to the zxr400 than this forum... check out www.zxrworld.co.uk also.
User avatar
deviant
zxr400 oc member
zxr400 oc member
Posts: 1352
Joined: Thu Jun 02, 2005 9:50 am
My Bike: ZXR400 L3
Location: Nottingham, UK
Contact:

Re: Measuring Valve Clearances.

Post by deviant »

cargo wrote: once the case hardening is gone they don't last much longer
And once they do go, it doesn't take long to knacker the cam that's running on it. which is expensive...hypothetically of course... :smt009

i'll be checking my clearances at some point soon.
In the garage:
Kawasaki ZXR400 L3 - shiny
Suzuki DR800 - bouncy
1978 Suzuki GS400 - PROJECT RETRO RACER!
Kawasaki GPz500S - for sale soon
Honda CG125 BR-J - in bits
User avatar
carsounds_dan
L-plate hell
L-plate hell
Posts: 268
Joined: Mon Aug 06, 2007 10:07 pm

Re: Measuring Valve Clearances.

Post by carsounds_dan »

I'm replacing my cams as we speak as my rockers scored mine.
a second hand set from a breakers works out about £100 whereas I payed £150 for a newer engine complete with supposed "beet" cams.
cheers
dan
The bike only goes as fast as you want it to...
...i know, it's great :D
User avatar
deviant
zxr400 oc member
zxr400 oc member
Posts: 1352
Joined: Thu Jun 02, 2005 9:50 am
My Bike: ZXR400 L3
Location: Nottingham, UK
Contact:

Re: Measuring Valve Clearances.

Post by deviant »

if you searched particularly hard you'd probably find the story of mine, but here's a brief precis to save you the effort.

- Put bike into Kwak dealer to check/sort valve clearances because it had started to sound a bit rattly in the head. Quoted about £100 plus cost of any shims.

- They find out that it's actually one of the cam followers and that it's scored the camshaft as well. By this time the bike is in bits, 15 miles from home, I'm pissed off with it and I already owe them a couple of hours labour, so I tell them to just put it right.

- They do, for a total of about £650. Most of which was labour (dropping the engine out), but at least £200 was a brand new inlet camshaft.

Obviously with hindsight I wouldn't have done it this way. Particularly since there was an entertaining postscript to the story when I found they had lost one of the fairing brackets in the process, and had to stand in the shop for a good half an hour making a nuisance of myself before the monkeys would make the "goodwill gesture" of replacing something that only cost about £3.
In the garage:
Kawasaki ZXR400 L3 - shiny
Suzuki DR800 - bouncy
1978 Suzuki GS400 - PROJECT RETRO RACER!
Kawasaki GPz500S - for sale soon
Honda CG125 BR-J - in bits
User avatar
carsounds_dan
L-plate hell
L-plate hell
Posts: 268
Joined: Mon Aug 06, 2007 10:07 pm

Re: Measuring Valve Clearances.

Post by carsounds_dan »

o nice. I replaced my camshafts last night for ones out of an engine i brought off of ebay. The engine had supposedly been fitted with beet cams, it arrived yesterday and i of course took it apart, it had a nice clean set of camshafts in it and had beet engine casings, what looks like a modified flywheel and a completely different sump on it than my L4 engine has on it. The camchain tensioner is the newer type with the springs but it looked like it had been bodged on with neumerous washers etc about it. So i took the cams and engine casings and fitted them to my block... hopefully she'll fireup shortly and be lovely and ready for a little fun in the wet :p
The bike only goes as fast as you want it to...
...i know, it's great :D
Post Reply