USD Conversion on my 400

Here's a chance to show off your zxr400, so get them digital cameras out and show us some piccies.Rebuilding your bike or modding it then let everyone in on it.

Moderator: Moderators

User avatar
Mori Man
Blingmeister
Blingmeister
Posts: 1976
Joined: Thu May 10, 2007 3:30 pm
My Bike: ZXR400J2
Location: JAPAN

USD Conversion on my 400

Post by Mori Man »

Some of you might already know that I have a ZRX400 & not a ZXR400 :smt087

However, I am installing a ZXR400H1 front end and a set of wheels on it too :smt026

I will add photos to this thread as soon as I am able - have been cataloging my progress :smt001

As of today it is full steam ahead on the swop over and I hope to do my first road report on Saturday. :smt003

Lots more to come :smt002
Nothing worse than having an H and not being able to scratch it !
Living life on the edge, SuPposedly
User avatar
masterofinsanity
Site Admin
Site Admin
Posts: 8100
Joined: Thu Aug 29, 2002 12:36 am
My Bike: Aprilia Tuono Fighter
Location: England
Contact:

Post by masterofinsanity »

look forward to seeing pics and don't worry bout it not being a zxr400 neither is mine :-)
Don't forget people there is more to the zxr400 than this forum... check out www.zxrworld.co.uk also.
User avatar
masterofinsanity
Site Admin
Site Admin
Posts: 8100
Joined: Thu Aug 29, 2002 12:36 am
My Bike: Aprilia Tuono Fighter
Location: England
Contact:

Post by masterofinsanity »

oops i split the wrong post naughty me.
Drew San wrote:1st piccy's :smt026

Photo's supplied by seller
Image
Image
Image

My own shot's

Image
Image
Image
Don't forget people there is more to the zxr400 than this forum... check out www.zxrworld.co.uk also.
User avatar
Mori Man
Blingmeister
Blingmeister
Posts: 1976
Joined: Thu May 10, 2007 3:30 pm
My Bike: ZXR400J2
Location: JAPAN

Getting the parts ready

Post by Mori Man »

Suddenly the conversion has come on leaps and bounds - the main reason was my own calipers fitted the USD's which has saved me a lot of work overhauling the original 4pot Tokico's.

I also had my local shop do the overhaul on the forks to save on time/energy too!

Decided to clean and semi-polish the bottom clamp, also removed the casting marks :smt003

Image
Image

Image
Image

Image
Image

This was done using a Nylon sanding pad on my angle grinder, but be careful as this was a milisecond touch on my knuckle!

Image
Nothing worse than having an H and not being able to scratch it !
Living life on the edge, SuPposedly
User avatar
Mori Man
Blingmeister
Blingmeister
Posts: 1976
Joined: Thu May 10, 2007 3:30 pm
My Bike: ZXR400J2
Location: JAPAN

Top clamp & Semi-polish

Post by Mori Man »

Next the top clamp got the treatment;

Image
Image

Image
Image

After that I started to polish up the bottom clamp;

Image
Image
Image
Nothing worse than having an H and not being able to scratch it !
Living life on the edge, SuPposedly
User avatar
RedexRobB
Site Admin
Site Admin
Posts: 7211
Joined: Fri Aug 30, 2002 7:37 pm
My Bike: ZXR400L3
Location: Ipswich, Suffolk

Post by RedexRobB »

wow thats some good work you done there mate! keep it up!
User avatar
Mori Man
Blingmeister
Blingmeister
Posts: 1976
Joined: Thu May 10, 2007 3:30 pm
My Bike: ZXR400J2
Location: JAPAN

Wheels stripped for painting

Post by Mori Man »

Next on the list was the wheels, shame the colour was wrong for my bike as they cleaned up really well :smt010

Image
Image

I chose a Kawasaki Green Black Pearlescent;

Image
Image
Image

After the top coat has been applied;

Image
Image
Image
Image
Nothing worse than having an H and not being able to scratch it !
Living life on the edge, SuPposedly
User avatar
Mori Man
Blingmeister
Blingmeister
Posts: 1976
Joined: Thu May 10, 2007 3:30 pm
My Bike: ZXR400J2
Location: JAPAN

Front muddy & Plastic welding

Post by Mori Man »

Now it was time to prep the front muddy to spray it the fastest colour :smt002

But it needed some small repairs done before the final primer and top coat goes on;

Image
Image

Got my soldering iron out;

Image

...and done this;

Image
Image
Image

Image
Image

These were just hairline cracks but if you need to repair scars,gouges or chip's then your local modelling (That'll be Airfix :smt002 ) shop will supply you with plastic rods in various colours.

A sand with 800 grit wet & dry and some kniffing putty soon smoothed it all out :smt001
Nothing worse than having an H and not being able to scratch it !
Living life on the edge, SuPposedly
User avatar
Mori Man
Blingmeister
Blingmeister
Posts: 1976
Joined: Thu May 10, 2007 3:30 pm
My Bike: ZXR400J2
Location: JAPAN

Stripping front end off ready for the swap

Post by Mori Man »

Nothing complicated here, I bought myself a bike jack for beer money and it works a treat :smt003 Rated to 500Kgs and very secure.

No siezed parts, but I have had the Bikini off before :smt007

Image
Image
Image
Nothing worse than having an H and not being able to scratch it !
Living life on the edge, SuPposedly
User avatar
Mori Man
Blingmeister
Blingmeister
Posts: 1976
Joined: Thu May 10, 2007 3:30 pm
My Bike: ZXR400J2
Location: JAPAN

Start the re-build

Post by Mori Man »

Things are going well so decide to locate the bottom clamp;

Image

I gave the bearings a fresh grease up! , and installed new seal's top and bottom;

Image

After that it was back on with the bars;

Image
Image

Wanted to see how the Bikini was going to line up with everything;

Image

.... and I picked up my forks around 6.30pm so had time to slide them in too see how they looked too :smt003

Image

(That was yesterday)
Nothing worse than having an H and not being able to scratch it !
Living life on the edge, SuPposedly
User avatar
masterofinsanity
Site Admin
Site Admin
Posts: 8100
Joined: Thu Aug 29, 2002 12:36 am
My Bike: Aprilia Tuono Fighter
Location: England
Contact:

Post by masterofinsanity »

looking good mate, keep the pics coming.
Don't forget people there is more to the zxr400 than this forum... check out www.zxrworld.co.uk also.
User avatar
Mori Man
Blingmeister
Blingmeister
Posts: 1976
Joined: Thu May 10, 2007 3:30 pm
My Bike: ZXR400J2
Location: JAPAN

1st road test

Post by Mori Man »

Start of rainy season today so was up and out early before it started to piss down :smt011

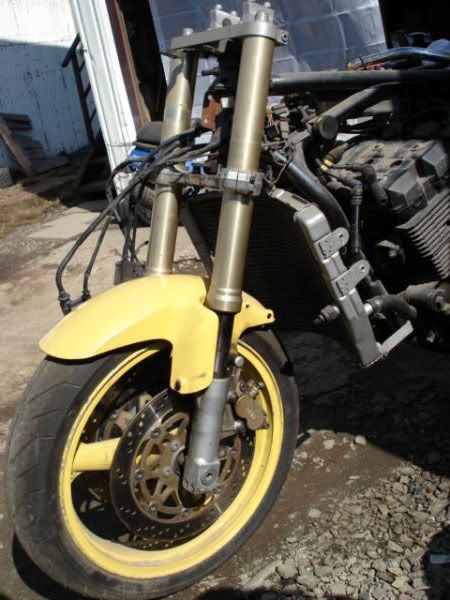
The front wheel got a new tyre fitted on it on Monday so it was sitting ready to go on;

Image

I went round and checked all my fixings for secureness and placed the ignition barrel under the seat. No clocks fitted just now - all will be revealed later! As you can see the muddy also went on in it's primer coat to allow me to have a run before the rain commenced;

Image
Image
Image

This is a rough build just now to get that 1st road test in and iron out the bugs over the next 4 weeks of rain. Come end July I should have nearly all other parts in place to finish but I will have cured all the little niggles like the "lock to lock" is too small and I need to do a 20 point turn!! Locate the ignition barrel for more practical use.

The performance already is stunning and I can't wait to start dialling in the suspension to bring out the best in it :smt003
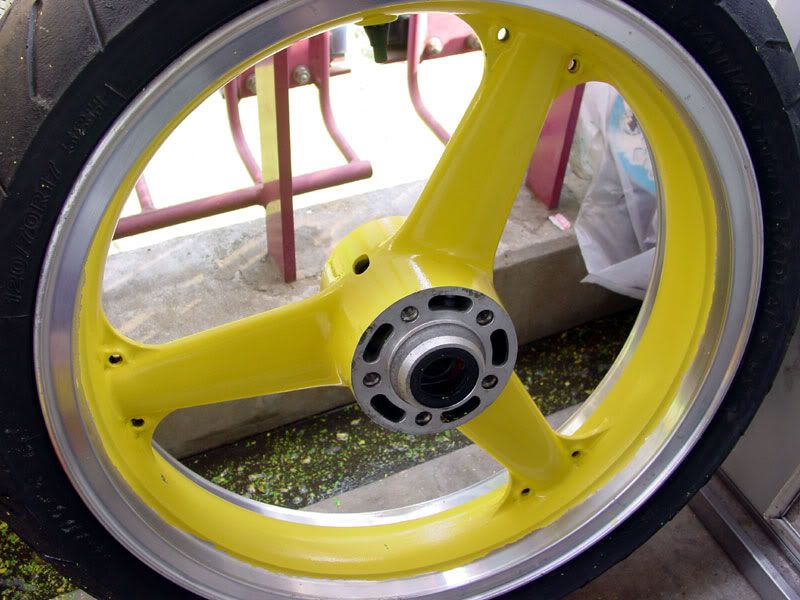
Rear wheel will need to wait until my existing tyre is a bit more worn as it is only 3 weeks old.


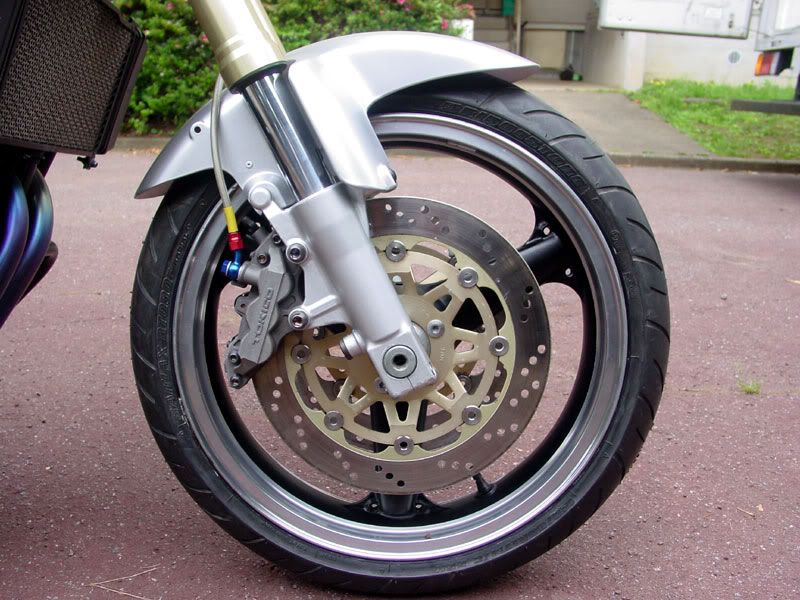
What it might look like nearer the end;

Image
Nothing worse than having an H and not being able to scratch it !
Living life on the edge, SuPposedly
User avatar
masterofinsanity
Site Admin
Site Admin
Posts: 8100
Joined: Thu Aug 29, 2002 12:36 am
My Bike: Aprilia Tuono Fighter
Location: England
Contact:

Post by masterofinsanity »

very nice again, wouldn't mind a zrx myself but think i'd go for the 1200 :smt003
Don't forget people there is more to the zxr400 than this forum... check out www.zxrworld.co.uk also.
gubbs
zxr400 oc member
zxr400 oc member
Posts: 355
Joined: Mon May 07, 2007 11:38 pm
My Bike: ZZR1100C3
Location: Nottingham
Contact:

Post by gubbs »

Looks amazing! Very nice bike indeed.

I have a few questions:

Nylon polishing pad to bring up the ally 'semi polished' looks great, much better than a full polish imho.

Was that all you did? Nylon pad? No other prep or treatment?

Also re: the paint you used on the wheels, was that rattle can or compressor job? What process did you follow? Prep with fine paper, prime, colour coats then t-cut it? Or just clear coat?
zxr400 h2 (breaking)
zzr1100c3 (broken)
Vespa et4 (almost broken)

My FleaBay

"Save the planet, eat a vegan .." - Clarkson
rene
zxr400 oc member
zxr400 oc member
Posts: 1918
Joined: Fri Feb 23, 2007 10:34 am
My Bike: kwack ZXR750L1
Location: Northampton

Post by rene »

that looks lovely, makes you feel warm and fuzzy to no that poeple still care about older bikes!

excerlent work
ZXR750 L1
tail tidy, polished bits, custom paint job, k&n, dynojet, Full akropovik, down geared, GSXR calipers, hel brake lines front and rear & clutch line, maxtron resprung froks 120BHP

BikePics page-
http://www.bikepics.com/members/zxr400rene/
Post Reply